How to Roll a Cone Joint (Made Easy): Step-by-Step Guide
re you a cannabis beginners who struggling to roll a cone joint? A cone joint offers smoother, longer-lasting smoke and might be your new best friend. Cone joints are those iconic, funnel-shaped joints that start wide at the tip and taper down to the mouthpiece. They can hold more herb and burn more evenly than straight cigarettes or joints. They give you a slow, satisfying burn. In this guide, we’ll walk you through everything from picking the right pre-rolled cones to mastering the roll a cone joint. It uses a conversational, story-like style so you can roll along with ease. So sit back, relax, and let’s roll (literally)!
What Is a Cone Joint?
Imagine a cone joint shaped like a very thin long ice cream cone – that’s essentially a cone joint. It usually involves a pre-rolled paper cone, often sold with a filter tip already in place.
You simply fill it with ground cannabis. The wider end allows you to pack in more flower, while the narrow end makes a convenient mouthpiece. Because of this shape, cone joints are beloved by smokers who want a bigger, smoother hit without constantly relighting or dealing with uneven burns.
Cone joints combine the familiarity of rolling papers with the convenience of a ready-made shape. You get the pride of rolling your own joint but with a bit of help – perfect if you “can’t roll a classic joint (or you’re feeling lazy)” as one source puts it. Sure, you could opt for a pipe or bong, but pre-rolled cones are one of the easiest and most portable options for enjoying your herb on the go. There’s also something special about smoking a joint you rolled yourself. Master the cone joint, and you might just become the go-to roller in your friend group!
Why are cone joints so popular?
Let’s break it down with a few key benefits that smokers love:
No Rolling Skills Needed (Convenience):
Pre-rolled cones come ready-made in that cone shape, so you don’t have to perform any tricky maneuvers with your fingers. This is the easiest way to roll a cone joint – just fill it, pack it, twist, and you’re done. It’s perfect for beginners or anyone who wants a quick smoke without fuss.
Larger Capacity for Herb:
The cone’s wide end can hold a lot more cannabis than a straight cigarette-style joint. That means a bigger smoking experience – ideal if you want a longer session or plan to share with friends. You won’t have to roll multiple joints; one cone can do the job.
Even Burn:
Cone joints tend to burn from a wider area down to a point, promoting an even burn and less “canoeing” (those pesky runs on one side of the joint). With a well-packed cone, you’ll get a smooth, steady cherry (the lit part) all the way through.
Customizable & Fun:
You can choose different sizes, paper types, and even flavors of cones to suit your mood. Whether you prefer natural unbleached hemp cones or jazzy flavored ones, there’s a cone for every taste. It’s a fun way to personalize your smoke. Plus, you can experiment with tips and tricks (like adding filters or trying fancy rolling techniques) once you get the basics down.
By now, you’re probably curious to try rolling a cone joint yourself. Before we dive into the how-to, let’s make sure you have the right cone and materials on hand.
How to Choose the Best Pre-Rolled Cones for Smoking?
Not all cones are created equal. Walk into any smoke shop (or browse online), and you’ll see a variety of pre-rolled cones in different sizes, materials, and even colors. Choosing the best one for your perfect cone joint can feel a bit overwhelming, but a few pointers will guide you:
Size:
Cones generally come in various lengths (from small personal cones to king-size cones meant for parties). Think about how much herb you want to pack and how many people will be smoking. If it’s just a quick solo session, a 1¼ size cone might do. If you’re rolling for a crowd or want an all-night burner, go for the king-size. Remember, the best cones for joints are the ones that match your desired smoking duration and group size. Don’t bite off more than you can smoke!
Material & Paper Type:
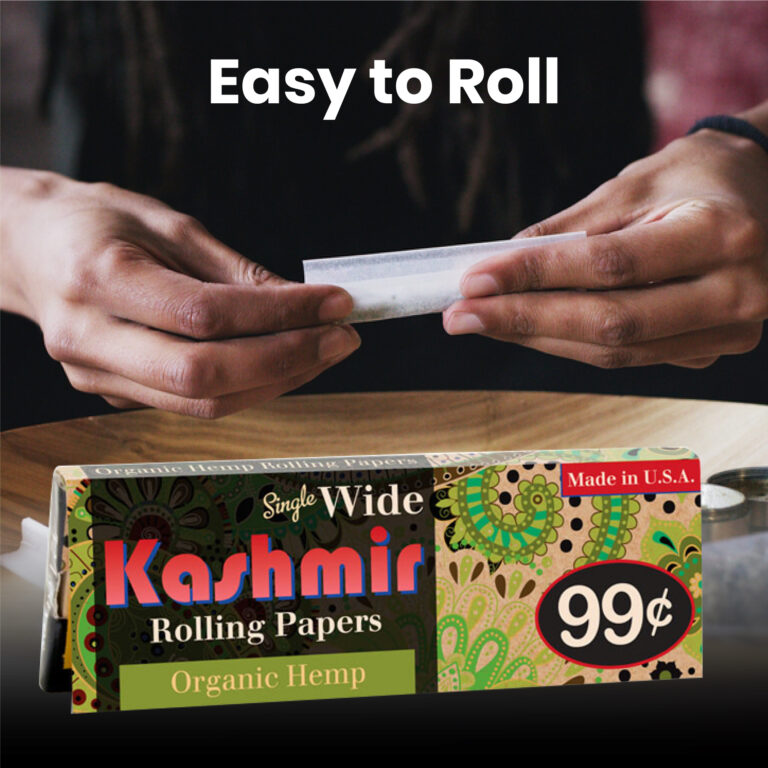
The material of the cone’s paper affects the flavor and burn. Common options include hemp, rice, or unbleached fiber papers. For example, Kashmir420 brand cones are made of unbleached hemp paper, giving an all-natural taste. If you prefer a pure experience, look for organic hemp cones or unbleached cones with no added chemicals. On the other hand, if you want to spice things up, some cones come in flavored varieties (think cherry, grape, even dessert flavors) that can add a fun twist to your joint. Choose a paper type that complements your smoking preferences – slow-burning hemp for a clean taste or perhaps a flavored paper for aroma.
Burn Rate:
A slow and even burn is key to an enjoyable joint. Thinner, high-quality papers tend to burn more slowly and evenly. Many pre-rolled cones advertise slow-burning properties on the package. Also, cones made from natural fibers (like hemp or rice) often burn cleaner and at a nice pace. If possible, read reviews or descriptions – you want a cone that burns evenly and doesn’t go out too easily or burn up too fast.
Filter Tip:
Check if the cone comes with a filter tip (crutch) already in place. Most pre-rolled cones do include a small cardboard filter at the narrow end, which is great for blocking plant bits and keeping the joint’s shape. If it has one, fantastic – that’s less work for you. If not, you might want to grab some filter tips separately or be ready to roll a crutch yourself (don’t worry, we’ll cover how to roll a filter tip later).
Brand and Quality:
Like any product, brand can matter. Reliable brands (such as Kahsmir420, RAW, Blazy Susan, or in-house brands like Kashmir’s own cones) usually mean consistent quality. They shouldn’t tear easily, and they use good paper. It’s okay to try a few brands to see which you like best. Some cones might be ultra-thin, others a tad thicker; some have special watermark patterns to prevent runs. If you’re new, you can’t go wrong starting with well-known pre-rolled cone joints from reputable makers.
Price and Quantity:
Cones range from budget-friendly to premium. Consider how many cones come in a pack and the price. If you’re just experimenting, maybe a small pack is fine. If you plan to roll cone joints frequently, buying in bulk (like a 50 or 100 pack) could save money. For example, Kashmir Pre-Rolled King Cones come in bulk packs that are both high-quality and cost-effective for avid smokers. Always balance cost with quality – the cheapest cones might not deliver the best experience, but the priciest aren’t necessary for a good joint either.
Tip: If you’re searching online, like “best cones for joints” or “best pre-rolled cones” might help you find recommendations. Ultimately, the best cone is the one that fits your needs and preferences. Once you’ve got your cones (and your favorite herb), you’re ready for the fun part: filling and rolling!
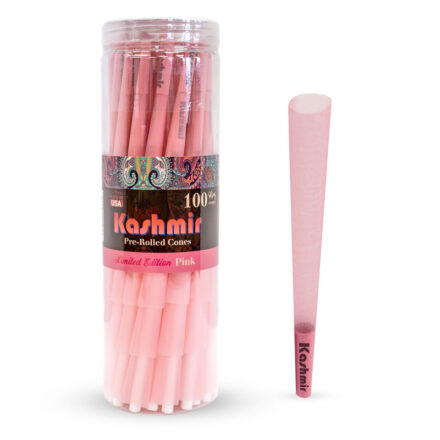
Buy our Kashmir Pre-Rolled Cones
How to roll a cone (joint)
Now that you’ve got the perfect cone in hand, it’s time to learn fill it up and get smoking. Rolling (or more accurately, packing) a cone joint is much easier than rolling a traditional joint from scratch. In fact, you don’t really roll anything – the cone is already rolled for you. The basic cone filling technique comes down to a few simple steps:
Grind Your Herb:
Start by grinding your cannabis to a nice medium consistency. Using a grinder is highly recommended for this. Aim for a grind that is not too fine (powdery) but also not in big chunks. Why? If it’s too fine, the ground herb can clog the airflow in the cone and make it hard to smoke; if it’s too coarse, the joint can become airy, flimsy, and burn too quickly. You want a fluffy yet evenly ground mix – think dried oregano-like texture. No grinder? No problem – you can break it up with your fingers, just try to get a uniform, small size and remove any seeds or stems that could poke holes.
Fill the Cone:
Hold your empty pre-rolled cone upright (wide end up, filter tip at the bottom). Using your fingertips or a small piece of paper as a funnel, gently spoon the ground herb into the cone. Go little by little rather than dumping it all at once. Every so often, give the cone a small shake or tap the tip against your palm – this helps the herb settle down towards the filter. As you fill, you can also use a packing tool (many cones come with a small stick or packing straw) to tamp down the herb lightly after each addition. The key is to fill evenly. Pro tip: Start by adding a bit of herb and packing the bottom first, then gradually add more in stages. This prevents any gaps or air pockets and ensures the cone is uniformly packed. You’ll literally see the cone “fill out.”
Pack It (But Not Too Tight):
Once the cone is nearly full, use a poker, straw, or even the non-writing end of a pen to pack the cannabis down gently. You want it firm enough that it will burn slowly, but not so tight that air can’t flow. There’s a Goldilocks zone here: too tight and you’ll struggle to draw smoke (or the joint might not stay lit), too loose and the cone will burn unevenly or “run” down one side. A quick test: you should be able to squeeze the filled cone gently between your fingers and feel a bit of give, but not a lot of empty squish. If it’s super hard, you overpacked – massage it a little to loosen up. If it’s very soft, add a bit more herb and pack a touch more.
Twist the Tip Closed:
Congrats – your cone is packed! All that’s left for basic prep is closing it up. Leave a small bit of paper at the top (if you filled to about a quarter-inch below the brim, you’ll have room). Now twist the excess paper at the top of the cone between your thumb and index finger. Twist it in one direction so that the top cinches into a kind of wick or little point. This secures your herb inside and creates a “fuse” to light. Don’t over-twist (which could rip the paper); just a tidy little twist so nothing spills out.
Light it Up:
Time to enjoy the fruits of your labor! Hold the joint by the filter end, put the twisted tip in your mouth (just kidding – light the tip, not suck on it). Use a lighter or hemp wick to evenly toast the twisted paper end. Let that “cherry” (burning ember) establish across the tip before you take a big inhale. Once it’s lit evenly, take a gentle pull. You should get smooth smoke thanks to your even pack and good grind. If one side starts burning faster (forming an uneven burn line), you can lick your finger and dab the faster-burning side or simply rotate the joint while burning to even it out. But if you packed well, you’ll likely get a nice even burn all the way.
That’s it – you’ve rolled (or rather, filled) your first cone joint! Pretty easy, right? With these basic techniques, you can get the job done and have a smoke-ready cone in minutes. But this is just the beginning. Once you’ve got the basics down, you can try a few tricks to take your cone rolling to the next level and impress everyone around. Let’s move on to some advanced tips for the truly cone-querors out there.
(Feeling proud? You should! But stay with us – below are some cool tips like using filters, rolling huge cones, and other hacks that will level up your cone joint game.)
how to roll the perfect joint or spliff from scratch?
So you’ve mastered the simple fill-pack-twist method and want to get a bit fancy? Maybe you’re aiming to roll the perfect cone joint every time or try something new to brag about. Here are some advanced techniques and tips to explore once you’re comfortable with the basics:
Rolling a Cone with a Filter Tip:
Many pre-rolled cones come with a filter, but if yours doesn’t or if you’re rolling your own cone from scratch, consider adding a filter tip (also known as a crutch). This is a small piece of rolled-up cardboard at the mouth end of the joint. Adding a filter tip not only gives the cone joint a sturdier mouthpiece but also results in a smoother smoking experience – no more burnt bits of herb flying into your mouth. You can buy pre-made filter tips or make one yourself (see the section on rolling a filter below). Simply place the rolled filter at the end of your paper or cone before packing it with herb. It will keep the joint open, maintain its shape, and filter out debris. Smoking a cone joint with a filter also lets you enjoy the joint to the very end without burning your lips or fingers.
Rolling a Cone with Multiple Papers (Extra-Large Cone):
Want to roll a giant cone joint that could put a regular one to shame? You can attach two rolling papers together in an L-shape to create a larger cone paper when you don’t have a single paper big enough. Here’s how: moisten the gum edge of one paper and stick it perpendicularly (at a right angle) near the end of another paper, forming an “L” shape. This gives you a much larger sheet to roll a cone with. Let it dry, then roll your cone joint as usual with this mega-paper. This technique allows for a serious cannabis capacity – great for parties or just showing off. Just make sure you seal the seam well and give the joint extra support while rolling since it’s larger and heavier. (Pro tip: There are also king-size or party-size pre-rolled cones you can purchase if DIY isn’t your thing.)
Rolling a Cone with a Crutch:
A crutch is basically another word for a rolled filter tip, usually made from thick paper or thin cardboard. Rolling a cone with a crutch means you create that mouth-end filter from scratch and incorporate it into your cone. It’s not separate from using a filter – it’s essentially the DIY version. To do it, take a small strip of cardstock, make a few accordion folds (like a tiny “M” shape), then roll the rest around those folds to form a cylinder. This crutch can then be placed at the end of your rolling paper as you form the cone. It gives structure and acts just like a filter. Some advanced rollers prefer making their own crutches to customize size or airflow. If you haven’t tried it yet, give it a go – it’s an easy way to roll a cone joint with a filter that fits your style exactly.
Rolling a Cone with a Spiral Twist:
Looking to add a bit of flair to your joint? The “spiral” cone technique might be for you. This is more of a party trick: you roll your cone joint as usual, but before you lick and seal it, you twist the paper around the cone in a spiral pattern. One way to do this is by slightly twisting the paper as you roll up the cone, causing the paper to wrap around itself in a spiral fashion. This creates a cool-striped look once it’s lit.
Another approach is to use two papers of different colors (say, an unbleached one and a pink one), layer them, and roll – the contrast makes a spiral pattern. Does it change the smoking experience? Not really – it’s mostly for style points. But it sure looks Instagram-worthy and might burn a tad slower due to the extra paper. Just be careful: extra paper can also mean a bit harsher smoke, so balance the style with function.
Using a Cone Roller Machine:
If all else fails and you want perfect cones every time with minimal effort, you can consider a cone roller machine (a little device designed to help roll cone joints). This is a gadget where you insert a paper or cone and your herb, then with a few quick motions, out pops a nicely rolled cone joint. Using a cone roller is straightforward – each device will have its own instructions, but generally you load the paper and herb, then roll or click the device to shape the cone. It’s a handy shortcut if you’re rolling lots of cones or just want consistency. Some purists might consider it cheating, but hey – the goal is a great smoke, and a cone roller can achieve that. If you’re curious, look up popular cone rolling machines, but remember: you can always roll a cone joint by hand with a bit of practice!
Experiment with these advanced techniques when you’re comfortable. Part of the fun of rolling is that it’s an art form – there’s always a new trick or style to try. Whether you’re adding a filter, rolling a massive cone for a party, or just playing around with cool shapes, these tips will elevate your rolling game. Just take your time and enjoy the process. Next, we’ll zero in on one of the most important aspects of a great cone joint: packing it properly.
How to Pack a Cone Joint for an Optimal Smoking Experience?
Packing a cone joint correctly is just as important as the rolling (if not more). A well-packed cone ensures an even burn, smooth draws, and no wastage of your precious herb. You’ve already learned the basics of packing in the step-by-step earlier, but let’s focus on packing technique with a few extra tips and tricks:
Grind to the Right Consistency:
As mentioned, a medium grind is ideal. Avoid ultra-fine powdery grind – it can clog the cone and restrict airflow. Likewise, big chunks can create air pockets and burn unevenly. Aim for a fluffy consistency where the herb is evenly shredded. This consistency creates a better texture for pressing up against the paper and maintaining airflow. If you notice powder collecting at the tip (filter end) of the cone while packing, you might want to re-grind a bit coarser or mix in some slightly larger pieces to improve airflow.
Pack with Care Using a Gentle Tool:
Often, pre-rolled cones come with a small packing stick or you can use something like a chopstick, skewer, or even that “eco-friendly pink straw” trick that some brands include. After adding a bit of ground herb into the cone, use the tool to tamp it down lightly. The goal is to eliminate gaps or empty space. However, do not stab or press super hard – you’re not trying to compact it into a dense brick, just settling the cannabis evenly. Pack a little at a time: add herb, tap it down, add more, tap again. This gradual filling ensures the cone is nicely packed all the way with no voids.
Check the Tension – Not Too Tight, Not Too Loose:
Every so often, check how the pack feels. You can do this by feeling the cone or doing a gentle test draw before lighting. If you draw (without lighting) and hardly any air comes through, it’s probably too tight. If you feel like it’s mostly air and no resistance, it might be too loose. As a rule of thumb, a well-packed cone should feel uniformly firm along its length, but still have a tiny bit of “give” when you squeeze it. You don’t want any section that’s significantly softer or harder than the rest. Remember: packing too tightly can clog the joint, while packing too loosely might cause it to burn unevenly or “run” down one side. Find that sweet spot by practicing and testing.
Tap and Settle:
After you’ve filled and preliminarily packed your cone, give it a tap. You can do this by holding the cone upright and gently tapping the filter end against a table or the palm of your hand a couple of times. This vibration will encourage the herb to settle down tightly into the cone, filling any small air pockets that might remain. You might even see the herb level drop a bit after tapping – a sign you can add a touch more if needed. Just don’t tap so hard that you risk bending the tip or spilling the contents; gentle taps do the trick.
Leave Room to Twist:
One common mistake is overfilling the cone all the way to the brim. You actually want to leave a little room at the top (about 1/4 inch) free of herb. Why? This empty paper at the end is what you’ll twist to seal the joint. If you fill to overflowing, you can’t properly close the cone without spillage. So stop filling when the herb is near the top but not level with it. Then grasp that empty paper, pinch it together, and twist it into a tight “wick” to close the cone joint securely. This twisted end not only keeps everything in place, but it also acts as a slow-burning fuse when you light it (ensuring the joint’s tip starts burning evenly).
Final Pack (if necessary):
After twisting, some people like to compact the herb one last time by gently pushing the twisted tip down a tiny bit. This can tighten the pack inside. If you do this, be very gentle – you don’t want to crush the joint, just snug things in. If everything feels good, you’re ready to spark up.
Even Lighting:
When it comes time to light, rotate the joint under the flame of your lighter to get an even charring on the twisted tip before it fully catches. Think of it like lighting a cigar – you want the entire circumference of the end to start glowing, not just one side. Once it’s evenly lit, take a slow, steady puff. If you see one side burning faster, you can lightly lick a finger and dampen that side, or just rotate the joint more as you continue to puff. A properly packed cone will usually correct itself and burn uniformly after the first couple of draws.
By packing your cone carefully and thoughtfully, you’ll ensure a smooth, enjoyable smoke from start to finish. There’s nothing worse than a joint that only burns on one side or keeps going out because of a bad pack. With these tips, you’ll get optimal airflow, an even cherry, and full flavor with every puff. Now that you’re a pro at packing regular cones, let’s switch gears and talk about something a little different: rolling a cone blunt for those who prefer cigars to papers.
Rolling a Cone Blunt: Step-by-Step Guide
You’ve probably heard of blunts – typically cannabis rolled in cigar or tobacco wraps. A cone blunt is essentially a blunt that’s shaped like a cone joint (wide on one end, tapered on the other). This can be a fun way to enjoy a larger amount of herb with the slow burn of a cigar wrap. Rolling a cone blunt is a bit more involved than using a pre-rolled paper cone, but if you’re up for the adventure, here’s a step-by-step guide:
Hollow Out a Cigar:
To make a cone blunt, you’ll need a cigar or cigarillo (popular choices are inexpensive cigarillos like Swisher Sweets, Phillies, or Dutch Masters). Take your cigar and split it open lengthwise. The easiest way is to use a sharp blade or razor: carefully cut a straight line from one end of the cigar to the other. Once it’s split, empty out all the tobacco (“gut” it) so you’re left with just the empty wrap. This tobacco leaf wrap will be your blunt paper. Tip: If you have a pre-packaged blunt wrap (hemp or tobacco leaf wrap sold for rolling), you can use that instead and skip the cutting step, as those come ready to fill.
Moisten the Wrap:
Blunt wraps (tobacco leaves especially) can be a bit dry and stiff, which makes them prone to cracking. The solution? Wet the wrap slightly. You can dip your finger in a little water and run it along the inside of the wrap, or even lightly lick the edges if you’re rolling for yourself (it’s a common blunt-roller move). The goal is to make the leaf pliable, not soaking wet. A little moisture helps the wrap bend and fold without breaking, and it will also help it stick closed later on.
Fill with Herb:
Now comes the filling. Just like with a paper cone, fill the hollowed wrap with ground cannabis. Because we want a cone shape, you’ll add more cannabis toward what will be the “tip” (the front, where you’ll light) and a bit less near the mouth end. However, since you’re using a whole cigar wrap, you have flexibility: you could aim to fill it evenly and then shape it, or actually try to form a cone by concentrating the weed at one end. It might help to form a crutch (filter) out of a small piece of cardboard and place it at the mouth end inside the wrap – this gives you a base to form the cone around and ensures there’s an airway. Gradually fill the wrap, using your fingers or a tool to distribute the herb.
Roll and Shape the Cone:
This is the tricky part. Gently roll the wrap around the herb, starting at the mouth end where the filter (or just the narrower end) is. Because you want a cone, the idea is to have one end thicker than the other. Tuck one edge of the wrap under the other edge as you roll it up, similar to rolling a normal blunt or joint, but guide the shape so that the front end is fatter. Take your time – tobacco wraps can be less forgiving than rolling papers. If a small crack develops, you can sometimes patch it with a piece of gummy adhesive from another paper or a bit of extra leaf (or even a thin dab of honey, which some people use as a blunt adhesive).
Twist the End:
Once you’ve rolled the wrap around the herb and it’s all enclosed, you should have one open end (the mouth end, possibly with a filter or just open) and one end where the excess wrap extends past the herb. At the wider, front end, leave a little extra wrap and then twist it closed. This is just like twisting the top of a paper cone joint. It seals the blunt and gives you something to light. The mouth end should be snug around your filter or the cylindrical shape you formed – no need to twist that side.
Bake (Optional, for Tobacco Wraps):
Here’s a pro blunt-rolling tip: if you used a natural tobacco leaf wrap (like a real cigar), it can help to “bake” your cone blunt a bit to dry it out and seal it nicely. Preheat your oven to about 200°F (93°C). Place your finished blunt on a baking sheet or piece of foil and bake it in the oven for about 10-15 minutes. This low heat will dry out the moisture you added and toast the blunt gently, which can improve its burn and help it stay closed. Keep a close eye to ensure it doesn’t scorch – you’re not cooking a turkey here, just drying a blunt! If you used a store-bought wrap or if this step sounds too involved, you can absolutely skip it. Just give the blunt a few minutes to air-dry before lighting.
Light and Enjoy:
Lighting a cone blunt is similar to lighting a cone joint, but it might take a bit more flame due to the thicker wrap. Use a lighter or hemp wick to evenly toast the twisted tip of the blunt. Once it’s uniformly lit, take a slow draw. Blunts tend to burn slower than joints, and with the cone shape, you’ve got a lot to enjoy. Relight as needed (sometimes they go out if you’re not puffing consistently – that’s normal for blunts). Sit back and savor the rich, flavorful smoke of your creation. Rolling a cone blunt is definitely a step up in complexity, but it can be a rewarding experience for those who enjoy the combination of cannabis with cigar wraps. The result is a slow-burning, robust smoke that can last a good while.
Just remember that cigar wraps contain tobacco (unless you use an herbal hemp wrap), so there’s nicotine involved as well. If you prefer to avoid tobacco, look for hemp wraps which are tobacco-free but can still be used to roll a cone-shaped blunt.
Alright, now that we’ve covered cones made of paper and even cones made of cigar wraps, let’s discuss the variety of materials you can roll cones with – a little tour of different types of cone wraps you might encounter.
Different Types of Cone Wraps
When it comes to rolling a cone, traditional paper cones (usually made of hemp, rice, or other fibers) are the go-to. But the world of rolling has evolved, and there are many types of wraps and cones you can experiment with. Each offers a unique smoking experience. Here are some popular types of cone wraps and what makes each special:
Hemp Wraps:
These wraps are made from hemp fibers, providing a natural and additive-free smoking experience. Hemp wraps (including pre-rolled hemp cones) typically have a slow burn and a clean flavor, meaning they won’t add any harsh chemical taste to your herb. Many cannabis enthusiasts love hemp papers and wraps because they enhance the cannabis taste instead of masking it. Plus, they’re nicotine-free, which is great if you want to avoid tobacco.
Flavored Wraps:
If you have a sweet tooth or just want to mix things up, flavored wraps or cones might be your jam. These can be paper or hemp-based. These can be paper or hemp-based. They’re infused with flavors like fruit (cherry, grape, strawberry), candy (chocolate, vanilla), or even natural blends (piña colada, anyone?). A flavored cone gives a burst of flavor in every draw, which can make smoking feel like a treat. Keep in mind that flavors can sometimes overpower the natural taste of your cannabis, but they’re fantastic for those who enjoy a little variety. It’s also a fun way to impress friends with a great smelling smoke.
Blunt (Natural Tobacco Leaf) Wraps for Rolling:
These are the wraps used for blunts – often made from tobacco leaves or pulp. They deliver a rich, robust flavor (thanks to the tobacco) and usually burn slower than regular papers due to their thickness. Cone wraps made of tobacco are less common as pre-rolled cones, but you can create a cone blunt using them as we described. They are ideal for group sessions or a long smoke since they can be larger and burn for a while. Just remember, they do contain nicotine, so the experience is a bit different than a pure cannabis joint. Some people love the combo of weed and tobacco leaf for the heady buzz it brings.
Palm Leaf Cones:
A newer trend in the smoking world is pre-rolled cones made from palm leaves (often from the Cordia palm). These palm leaf cones are all-natural, usually chemical-free, and offer a smooth, slow burn somewhat similar to tobacco wraps but without any tobacco or nicotine. They often come with a filter tip included and are praised for being a healthier alternative to traditional blunt wraps. The flavor is neutral to smooth, letting you taste your cannabis, and they tend to burn for a long time. Palm cones are a bit pricier, but many users swear by their quality and burn time.
Other niche options:
There are other niche options too – for example, rose petal cones (yes, people literally roll or buy cones made from pressed rose petals for a luxurious touch) or gold paper cones (24k gold-coated papers for when you’re feeling flashy). But the four types above are the most common you’ll come across. Each type of wrap brings its own vibe to your cone joint. If you’re all about pure flavor and health, go hemp or palm. If you like a bit of flavor or don’t mind tobacco, try flavored papers or traditional blunt wraps. Experimenting is half the fun – you might discover that you love the slow burn of a palm cone during a chill evening, but prefer a quick hemp cone for a daytime smoke.
Now that you know your options, you’re well-equipped to choose the perfect wrap for your cone joint experience. Next, we’ll provide a straightforward step-by-step recap on actually creating a cone joint from scratch, in case you want to roll one without using a pre-rolled cone. This will tie together some of the techniques we’ve discussed (including making that filter and shaping the cone).
How to Roll a Cone Joint from Scratch: Step-by-Step Guide
Up to this point, we’ve often assumed you have a pre-rolled cone to fill. But what if you just have regular rolling papers and want to roll a cone-shaped joint yourself? No worries! With a bit of practice, you can roll a cone joint from scratch using ordinary papers. It’s a bit more artful than filling a ready-made cone, but it’s a satisfying skill to master. Follow these step-by-step instructions to roll the perfect cone joint on your own:
Gather Your Materials:
You’ll need a few basics on hand. Grab some rolling papers (if you want a cone, king-size papers or larger are easier to work with, but you can do it with standard papers too), a grinder to break up your cannabis, some filter tip paper (or thin cardboard for a crutch), and of course your cannabis of choice. A packing tool (like a pen or toothpick) is helpful, and a tray or clean surface will make the process easier. Essentially, set up just as you would for rolling any joint – being prepared makes it smoother.
Grind Your Cannabis:
Use your grinder to crush your herb to an even consistency. As mentioned earlier, aim for a medium grind – not dust, not chunky. A consistent grind ensures the joint burns evenly and makes it easier to shape the cone without lumps or gaps. Once ground, set the herb aside within easy reach.
Prepare a Filter (Crutch):
>If you have a pre-made filter tip, you can use that. Otherwise, it’s simple to roll your own. Take a small strip of thick paper or thin cardboard (many rolling paper packs come with filter papers, or you can tear a strip from a business card in a pinch). Fold a few small accordion pleats at one end (like making a “M” or zig-zag shape), then roll the paper around those folds to create a little cylinder. The folds help the filter maintain a springy structure and not just unroll. You’ve now got a filter tip! It should look like a tiny paper spring or spiral. The length is up to you, but ~1/2 inch long is standard. This filter (crutch) will be the base of your cone joint and will keep the mouthpiece open and structurally sound.
Shape the Paper into a Cone:
Here’s where the cone magic happens. Take your rolling paper and place the filter at one end of the paper on the side where you’ll start rolling (usually one of the shorter ends if using a king-size paper). Begin to roll the paper around the filter tip. As you roll, keep the filter end tighter and allow the paper on the other end to form a wider shape. You might start with the paper at a slight angle to the filter – the end by the filter will overlap more, while the far end has more paper slack to accommodate herb. Use your thumbs and index fingers to roll the paper back and forth, shaping the cone.
This means you are pinching the paper around the filter and the herb (once you add some) and rolling it to create that cone form. It can help to sprinkle a little bit of ground cannabis onto the paper before you start shaping – this gives the paper something to grip against and form the cone shape. As you roll, tuck the edge of the paper (the side without adhesive) under the other side just in front of the filter and progressing toward the tip. Take your time and be gentle; you’re coaxing the paper into a cone. It might feel fiddly at first, but with practice it becomes second nature.
Fill with Cannabis:
As you’re shaping the cone (or right before sealing it, depending on your method), start adding your ground cannabis into the cone. If you’ve managed to form the paper into a cone shape already, you can pinch the cone in one hand (filter end down) and use the other hand to drop in pinches of herb. If the cone is not sealed yet, you might be doing this while still holding the roll closed – that’s okay, you can add a bit of herb, shape, add more, etc.
Make sure the cannabis is distributed evenly, with slightly less near the filter and more toward the tip, to maintain that cone shape. Periodically pack the herb down gently with your packing tool or the tip of your finger as you fill, to ensure there are no big air pockets. You don’t need it super tight (remember the airflow!), but it should be snug.
Seal the Joint:
Once the paper is filled and you’re happy with the shape, it’s time to close it up. This is where that adhesive strip on the rolling paper comes in. Lick the gummed edge of the paper (the sticky strip) – a slight lick or dampen is enough – and then press it down starting at the filter end and moving along to the tip. Because of the cone shape, you might seal the filter end first, then gradually smooth and seal the rest of the paper as it curves outward.
If you find it tricky, try to get the portion near the filter nice and tight and sealed, then you can twist the excess paper at the tip to close the cone and seal the rest by twisting. One method is to actually twist the wide end closed first, then lick around the edge and press to seal – do what works for you. The main point is to get the paper stuck to itself so the cone holds its shape. If done right, you’ll have a cone joint that stays together, with a nice filter at one end and a closed, twisted tip at the other.
Finishing Touch – Pack and Let it Set:
After sealing, you can pack the end (tip) a bit more if needed by gently tamping the herb from the tip side using a packing stick (since you likely didn’t fill it 100% to the brim before twisting, you might have a little space to push the herb into). Sometimes rolling a cone from scratch leaves a tiny bit of looseness; you can fix that by packing lightly. It’s also a good idea to let the joint dry for a minute or two if you used a lot of saliva on the gum – nobody likes a soggy joint. Just wave it in the air or leave it on a table for a moment. This helps the seal set properly and prevents runs.
Congratulations, you just rolled a cone joint from scratch! 🎉
This definitely takes a bit more skill than using a pre-rolled cone, so if your first attempt isn’t perfect, don’t be discouraged. With each attempt, you’ll get a better feel for how to distribute the herb and shape the paper. Many seasoned rollers will tell you that their first cone joint looked more like a pregnant guppy (fat in the middle, ends too skinny) or was lumpy and loose. Practice is key – after a few tries, you’ll be rolling gorgeous cones that could rival the pre-rolled ones in the dispensary.
Remember, a well-rolled cone joint should have the bulk of the cannabis toward the tip, a clean taper down to the filter, and an even firmness throughout. If it’s lopsided or has air pockets, gently roll it between your fingers to even it out or tap it on a surface to settle the herb. Ultimately, the goal is a smooth smoke, so as long as it draws well and burns evenly, you did a great job.
How to different kind of paper tips for cone joints?
We’ve mentioned filter tips (aka crutches) several times, and for good reason: they make a world of difference in your joint experience. Many raw cone joints or other pre-rolled cones come with a filter already in place, but if you’re rolling your own or your cone didn’t have one, you can easily add it. Let’s quickly go over how to roll a proper filter tip for your cone joint:
Cut a Strip of Cardboard or Filter Paper:
You’ll need a small rectangular strip, roughly 1 inch (2.5 cm) wide and maybe the same in length (you can adjust to your preferred tip thickness). Many rolling paper booklets have perforated strips for this purpose. Standard business card stock or the cardboard from a cigarette pack can work too – just make sure it’s not coated (no glossy finish).
Start the Zig-Zag Fold:
At one end of the strip, make a small accordion fold. This means you fold a tiny flap down, then back up, creating a zig-zag or “M” shape in the paper. Each fold should be about the width of the filter’s diameter you want (typically 2-3 millimeters per fold). Doing 2–3 folds is usually enough (making an “M” or “W” shape). These folds act as the support structure and also prevent you from inhaling bits of weed – they block the pathway just enough.
Roll it Up:
After the initial folds, start rolling the remaining strip around those folds. Roll it tightly, keeping it straight. You want to end up with a little cylinder. The folds you made will be at the core of this cylinder, and they help it spring back if squeezed. Roll until the entire strip is wound up. If it tries to uncoil, just hold it for a few seconds; the paper often will loosen slightly to the perfect diameter on its own.
Size it to Your Joint:
Take the rolled filter and place it at the mouth end of your cone joint (or in your rolling paper before you roll up). It should be snug – you don’t want it falling out or moving around. If it’s too small (diameter too thin), it might slide out or not keep the joint open; in that case, unroll and add another half-turn or so. If it’s too big to fit in the paper, unroll a little or trim the strip length. The beauty of a crutch is you can adjust it. Once it’s the right size, it should sit nicely at the end of the cone.
Insert and Pack:
If you’re using it in a pre-rolled cone, just gently insert it into the narrow end until it’s flush with the end of the cone. If rolling from scratch, you’d put it at the end of your paper and roll the cone around it as we did in the steps above. Ensure the filter is positioned straight and right at the end – you don’t want gaps where bits of herb can slip out around it. Fill and pack your cone against the filter so it’s firmly in place.
Benefits of Using a Filter Tip:
A well-rolled filter will cool down the smoke slightly, block any small particles (no one likes “scooby snacks” or hot ash hitting their tongue), and provide a sturdy mouthpiece that won’t collapse. It also means you can smoke the joint all the way down without burning your fingertips, because the filter acts as a buffer. If you roll a cone joint with a filter, you’re basically giving it a backbone – it’s less likely to get squished or bent out of shape.
Rolling a filter tip is a quick skill to pick up, and it’s absolutely worth it for the improvement in your smoking experience. Some people roll without filters out of habit, but once you start using them, you might not go back. It’s that little touch that makes your joints look professional and smoke smoothly. Plus, when a friend sees you casually crafting a perfect filter tip in seconds, they’ll be quietly impressed (or outright asking you to teach them).
Now that your cone joint is rolled, packed, filtered, and ready, let’s cover a few final tips specifically about using Kashmir cones (a popular brand) and some closing thoughts to ensure every cone you roll is a winner.
Tips for Using Kashmir Cones Effectively
Raw cones (from Kashmir Rolling Papers) are extremely popular in the cannabis community. They’re known for being made of unbleached, natural hemp paper and come in various sizes with filter tips pre-installed. If you’re using Kashmir pre-rolled cones (or any similar all-natural cone), here are some tips to get the best experience:
Grind Your Herbs Well:
Always use a grinder to break down your herbs into small, even pieces before loading a Kashmir cone. Kashmir cones are thin and designed for an even burn; a good grind ensures you don’t get lumps that could cause uneven burning or restrict airflow. As mentioned earlier, avoid a powdery grind – Kashmir cones have a tiny hole in the tip (filter) and too-fine particles could get through or clog it. Aim for that Goldilocks medium grind for optimal results.
Pack the Cone Gently:
Kashmir cones usually come with a little straw or stick for packing. Use it! Fill the cone gradually and pack the herb down with the straw or packing tool. Don’t jam it with brute force; Kashmir cones are sturdy but you could still tear the paper if you stab too hard. Pack firmly and evenly, but not so tight that it could compromise airflow (remember our packing tips). The natural gum on Kashmir papers sticks well, so twisting the end will be secure as long as you packed properly.
Twist the Tip Securely:
Once your Kashmir cone is filled, twist that top just like any other cone. Kashmir cones have a little extra paper at the end just for this purpose. A snug twist will keep all your herb in place and make lighting easier. If you’re packing a Kashmir cone for later, a nice tight twist also prevents spillage if it jostles around in your pocket or bag.
Light Evenly and Slowly:
Kashmir papers are known for a slow, even burn, but you have to treat them right. When lighting a Kashmir cone, don’t torch it aggressively. Use a moderate flame and rotate the cone to toast it. Once it’s lit, take a gentle puff to get it going. Kashmie cones can canoe if lit improperly, but if you see an uneven burn, quickly correct it by touching the faster-burning side with a little moisture (just a dab with your finger) or by re-lighting the slower side. Usually, if you packed right and lit carefully, it will burn like a champ.
Store Them Properly:
Kashmie cones (and any pre-rolled cones) should be stored in a cool, dry place. Too much humidity can make them limp or moldy; too little (very dry conditions) can make them brittle. Keep them in their packaging until use, and avoid crushing them. A Kashmie cone with a bent tip or a crease might lead to an uneven burn. If you have a partially used cone, you can snuff it out and save it for later, but put it in a doob tube (those little cylindrical containers) or an airtight jar to preserve freshness. You’ll thank yourself when you re-light it and it still tastes good.
Appreciate the Natural Quality:
Kashmir cones are unbleached and have no added chalk or dyes. This means the paper has a brownish tan color and a slightly softer feel. It also means you’re getting a very pure flavor from your joint – essentially just tasting your cannabis. Some people find Kashmir rolling papers a bit harsher than rice papers (for example) because they are thicker, but many love them for the robust smoke and even burn. If you’re using Kashmir cones effectively, you’re likely someone who values that natural smoking experience. So, sit back and enjoy the clean taste as you puff – it’s one of the reasons Kashmir cones have such a loyal following.
Whether you’re team Kashmir or prefer other brands, these tips generally apply to all pre-rolled cones. Treat the cone gently but pack it with care, and it will reward you with a fantastic session. Now, let’s wrap up our cone journey with a final note.
Final Note
Deeply enjoyable experience:
Rolling and smoking cone joints can be a fun, rewarding, and deeply enjoyable experience for both newcomers and seasoned smokers alike. We’ve journeyed through the basics and the finer points: from understanding what a cone joint is and why it rocks, to choosing the right cones, learning basic and advanced rolling techniques, packing like a pro, and even venturing into cone blunts and various wrap materials.
Choose the right papers or cones:
A few parting tips to remember: always choose the right papers or cones for your needs, grind your herb consistently, and pack the cone firmly but not too tightly. Take your time when rolling – a little patience can turn a good joint into a perfect one. Don’t be afraid to experiment with different styles or tricks, because that’s how you’ll discover what works best for you. Maybe you’ll find that using a filter tip makes all the difference, or that a particular brand’s cones burn just the way you like it.
Enjoy the process:
Most importantly, enjoy the process. Rolling a cone joint is as much an art as it is a means to an end. There’s a simple pleasure in crafting your smoke, and it can be almost meditative. And when you finally spark up that perfectly rolled cone, take a moment to savor it. You did that! Savor each puff of your creation, and share the moment (and maybe the joint) with friends if you’re so inclined. After all, cannabis has a way of bringing folks together.
Practice makes perfect:
So whether you’re lighting up a quick personal cone or showing off a party-sized masterpiece, you now have the knowledge to do it with confidence. Practice makes perfect – don’t worry if your first few cone joints aren’t exactly Instagram-worthy. You’ll get better each time. Before long, rolling a cone will feel like second nature, and you might even find it therapeutic.
Now go forth and roll the cone joints of your dreams! And if you’re ever in need of quality papers, cones, or accessories, remember to check out our offerings at Kashmir420 for the best deals on cones, rolling papers, and more. Happy rolling, and enjoy your smoke!
Discover more from Kashmir420
Subscribe to get the latest posts sent to your email.
